
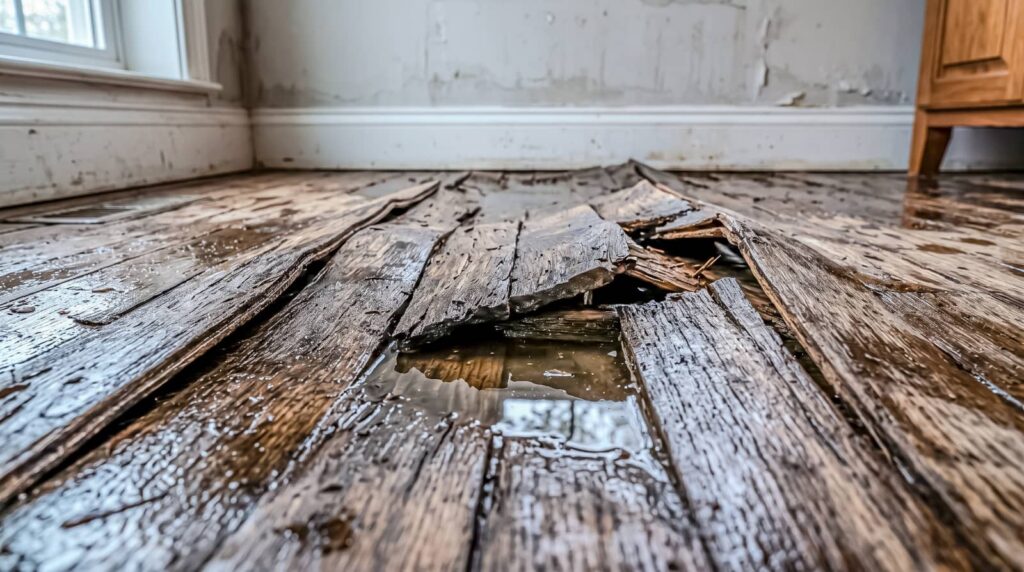
What you may not know is that flood restoration pricing often starts before visible repairs begin, with moisture mapping, contamination testing, and equipment staging. Your total can climb fast as water gets deeper, more rooms are affected, and debris or sewage changes the cleanup method. Drying time, material replacement, mold risk, and insurance limits all shape the final bill, and the biggest cost drivers aren’t always the ones you notice first.
Key Takeaways
- Flood restoration costs include water extraction, drying, sanitation, repairs, and material replacement.
- Greater water depth and more affected rooms increase labor, equipment, and drying expenses.
- Contaminated water, especially sewage or chemicals, requires specialized cleanup and raises costs.
- Longer drying times and hidden damage can add major equipment rental and repair charges.
- Material replacement, mold removal, and insurance coverage limits strongly affect final out-of-pocket costs.
What Flood Restoration Costs Cover
Flood restoration costs cover the work needed to return your property to a safe, usable condition, including water extraction, drying, cleanup, repairs, and material replacement.
You’re paying for labor, equipment, and supplies that remove moisture, prevent mold, and restore damaged spaces. Contractors also inspect hidden damage, document losses, and coordinate disposal of unsalvageable items.
These flood damage restoration cost factors can shift with the size of the job, the materials involved, and how much reconstruction you need.
You’ll usually see separate charges for emergency response, drying equipment, sanitation, and finish repairs. Understanding each line item helps you compare estimates, ask focused questions, and stay connected to the process.
That clarity lets you plan with confidence and move forward with your home.
How Water Depth Raises Costs
When water stays shallow, you’ll usually see lower restoration costs because it affects fewer materials and dries faster.
As depth increases, you’ll pay more for extraction, drying, and debris removal, especially when water reaches multiple rooms.
Deeper flooding also drives up costs fast because it can damage subfloors, walls, and structural components.
Shallow Flooding Costs Less
Shallow water usually keeps restoration costs lower because it affects fewer materials and lets crews dry the space faster. You often need less demolition, fewer replacement items, and shorter equipment rental periods, which can protect your budget.
If the water stays near the floor surface, technicians can remove it quickly, place air movers, and monitor moisture without opening many walls or lifting large sections of flooring. That means you’re more likely to keep repairs focused and manageable.
Acting early helps your team prevent secondary damage, so you stay in control with a smoother recovery. For homeowners, this lighter scope can make the process feel less overwhelming and more predictable, especially when you want a practical path back to normal.
Deeper Water Means More
As water rises, restoration costs usually climb because deeper flooding reaches more materials, more rooms, and more building systems. You’ll pay more when water soaks drywall, baseboards, insulation, and flooring across larger areas, since crews must remove, haul, and replace more content.
Deeper water also slows drying, so equipment runs longer and labor hours increase.
- Water at or above outlets adds safe shutoff and inspection time.
- Extra rooms mean more furniture moving and cleanup.
- Saturated finishes often need full replacement, not spot repair.
- Longer drying can raise monitoring and dehumidifier costs.
If you’re comparing estimates, ask how many square feet were affected and which materials need removal. That helps your restoration team give you a fair, shared plan.
Structural Damage Increases Quickly
Once floodwater reaches structural components, damage accelerates fast because framing, subfloors, drywall, and insulation absorb moisture and lose integrity.
You’ll see costs rise as water climbs higher, since more materials need removal, drying, and replacement. Shallow water may affect only finishes, but deeper water can weaken load-bearing assemblies, warp floors, and trap moisture inside walls.
That means you’re paying for demolition, antimicrobial treatment, and longer equipment rental. If the flood reaches electrical or HVAC systems, repairs get more complex and your timeline stretches.
You can lower risk by acting quickly, documenting damage, and getting a full inspection early.
When your home’s structure is compromised, restoration isn’t just cleanup—it’s a coordinated rebuild that protects your home and your peace of mind.
Why More Rooms Mean Higher Costs
When floodwater reaches more rooms, restoration costs usually rise because crews must inspect, extract, dry, and repair a larger area. You’ll pay for more labor hours, more equipment moves, and more scheduling time.
Each affected room adds set-up, monitoring, and cleanup steps, so the job gets longer and more complex. You and your contractor need a clear room-by-room scope to avoid surprises.
- More square footage needs more drying equipment
- Extra rooms take longer to document and assess
- Labor increases with each separate work zone
- Repairs often stack across floors, halls, and closets
When you understand this pattern, you can plan with confidence and stay aligned with the team.
How Contamination Drives Up Costs
When floodwater carries sewage, chemicals, or debris, your contamination level jumps and so does the restoration scope.
You’ll pay more for hazardous cleanup because crews need specialized PPE, containment, and disposal procedures.
Sanitization, antimicrobial treatment, and regulated waste removal add labor, materials, and disposal fees.
Contamination Levels
Contamination levels can sharply increase flood restoration costs because the more polluted the water, the more labor, protection, and disposal steps you’ll need.
When floodwater carries mud, sewage, or household chemicals, you’ll need extra containment and more careful cleanup, which adds time and service calls. Your crew may also need to remove soaked porous materials faster to limit spread, increasing labor hours.
- Clean water usually means simpler drying and fewer removals.
- Gray water raises cleaning time and material replacement.
- Heavily contaminated water slows access and boosts labor.
- More contamination often means higher disposal and transport fees.
If you’re comparing bids, ask how each company classifies contamination.
Clear categories help you spot fair pricing and join neighbors who plan restoration costs wisely.
Hazardous Cleanup Costs
Hazardous flood cleanup can push restoration costs up fast because crews must follow stricter safety, containment, and disposal procedures.
If floodwater carries sewage, chemicals, or mold-heavy debris, you’ll need trained technicians and specialized gear, which raises labor charges.
Your crew may have to isolate impacted rooms, seal pathways, and monitor air quality before work starts. That extra setup adds billable hours and slows drying in nearby areas.
More contamination also means more protective measures for your home’s finishes, HVAC, and contents, so the job can expand beyond the wet rooms.
You’ll often see higher costs when damage reaches porous materials, since they absorb pollutants and need more careful handling.
The more hazardous the water, the more your restoration team must invest in safety and control.
Sanitization And Disposal
If floodwater carries sewage, chemicals, or mold, sanitization and disposal costs climb because crews can’t simply dry the area and move on. You’ll pay for antimicrobial cleaning, HEPA filtration, and regulated waste hauling before repairs begin.
Contaminated drywall, insulation, carpet, and porous furnishings often need removal, bagging, and landfill fees.
- Category of water drives treatment level
- Porous materials usually get discarded
- Larger affected rooms mean more labor
- Disposal logs and safety gear add cost
If your home has a basement, kitchen, or laundry area, expect higher losses when contamination spreads through cabinets and subfloors.
You’re not alone here—these steps protect your household and the rest of your recovery budget.
Drying Time and Equipment Fees
Drying time often drives a large share of flood restoration cost because crews must keep air movers, dehumidifiers, and sometimes heaters running until moisture levels drop to acceptable levels.
You’re paying for the clock and the equipment, so every extra day adds rental, labor, and monitoring fees. Technicians usually check humidity, surface moisture, and temperature to confirm the space is drying evenly.
If hidden dampness lingers, they’ll extend the setup to protect you from secondary damage. You can help reduce costs by improving airflow, keeping doors open when safe, and following crew instructions.
Faster response usually means shorter drying, which helps your team stay on schedule and keeps your bill more manageable.
Repair Costs for Walls, Floors, and Ceilings
Once the water is out and the structure has dried, repair costs for walls, floors, and ceilings depend on how far moisture spread and what materials absorbed it. You’ll usually pay for patching, sealing, sanding, repainting, and minor carpentry.
If drywall swelled or buckled, crews often cut back damaged sections and finish the edges. Subfloor repairs can add labor when the surface feels soft or uneven. Ceiling work costs rise when staining, sagging, or cracked joints need correction.
- Inspect hidden seams early.
- Document damage before work starts.
- Match finish levels to nearby areas.
- Keep repairs localized to control labor.
You can reduce surprises by asking for itemized estimates and confirming whether cleanup, primer, and surface prep are included. This keeps your crew aligned and your budget steadier.
Replacement Costs for Different Materials
Replacement costs vary by material because some products absorb water and fail fast, while others can be dried, cleaned, and reused.
You’ll usually replace drywall, insulation, particleboard, and carpet first, since they lose strength and shape after saturation.
Solid wood trim, hardwood flooring, tile, and metal fixtures often cost less to keep if you dry them quickly and they stay stable.
Engineered products can sit in the middle: they may need partial replacement, matching labor, and finish work.
Cabinets, subflooring, and baseboards also add up fast because you pay for removal, disposal, and new installation.
To stay on budget, group similar materials by room, compare unit prices, and ask for exact quantities.
That helps you plan like a prepared homeowner and avoid surprises.
Mold Removal and Hidden Damage Costs
Mold removal and hidden damage can raise flood restoration costs fast, especially if water sat long enough to soak framing, insulation, subfloors, or wall cavities.
You’ll usually pay more when crews must open finished surfaces to find trapped moisture and decay. That’s where your project can expand quickly.
- Mold grows in damp, warm spaces.
- Hidden rot weakens structural members.
- Insulation often traps moisture and odors.
- Wall cavities may need full drying.
If you catch these issues early, you can limit demolition and reduce labor.
If you delay, you’ll often need deeper cleanup, antimicrobial treatment, and more material replacement. Staying alert helps you protect your home and keeps you in control with the rest of your community.
How Insurance Handles Flood Repairs
You should verify your policy’s coverage limits first, because flood repairs often exceed standard caps and may only cover specific damage types.
You’ll also need to account for deductibles and claims processing, since they reduce your payout and can affect how quickly you get reimbursed.
Exclusions and carrier delays can leave gaps in funding, so you should document losses carefully and confirm what your policy won’t pay for.
Coverage Limits
Insurance limits often set the ceiling on flood repair payouts, so even a large loss may not cover the full cost of drying, demolition, cleanup, and rebuilding. You should review your policy’s dwelling and contents caps before you start work, because coverage usually tracks specific categories, not every damaged item.
Your team can estimate eligible costs, but the insurer only pays up to the stated maximums.
- Check whether your limit matches local rebuild prices.
- Compare structure coverage with personal property coverage.
- Confirm whether separate limits apply to basements and detached spaces.
- Match your repair plan to what the policy actually funds.
When you know the cap, you can plan smarter, prioritize critical rooms, and avoid surprises that strain your household.
Deductibles And Claims
How much will you pay before coverage starts? Your deductible is the amount you absorb before your flood policy helps, and it directly affects your out-of-pocket repair cost.
If your claim is approved, you submit photos, inventories, and contractor estimates so the insurer can verify water depth, affected rooms, drying needs, and material replacement. The adjuster then compares those losses to your policy limits and deducts your chosen deductible from the payout.
You’ll get the best results when you document damage fast, keep receipts, and track emergency mitigation steps like pumping, drying, and debris removal. That record supports a smoother claim and helps your household stay on the same page while restoration crews work.
Exclusions And Delays
Even with a valid flood claim, coverage gaps and processing delays can slow repairs. You still need to confirm what your policy excludes, because many plans don’t cover basements, mold beyond the first 48 hours, code upgrades, or delayed mitigation.
Your adjuster will also verify water depth, affected rooms, contamination, drying time, repairs, and material loss before authorizing payment.
- Document every damaged room right away.
- Save receipts for pumps, drying, and cleanup.
- Ask for written reasons for any denial.
- Track claim dates, inspections, and follow-ups.
If you stay organized, you can reduce disputes and move faster with your insurer. That keeps your restoration team aligned and helps you get back to normal with less stress.
How to Cut Flood Repair Costs
To cut flood repair costs, act fast and target the biggest damage drivers first: pump out standing water, remove soaked materials, and dry the space before mold spreads.
You’ll save more by reducing water depth exposure, limiting how many rooms stay wet, and separating clean water from contaminated water.
Photograph damage, then call your insurer and a certified restorer so you can document losses and avoid repeat labor.
Salvage solid framing, trim, and cabinets only if they’re dryable and not warped.
Use fans, dehumidifiers, and open airflow to shorten drying time.
Replace drywall, insulation, and carpet only where moisture testing shows damage.
Keep your crew aligned on scope, because small missed areas often turn into bigger repairs later.
Frequently Asked Questions
How Do Local Labor Rates Affect Flood Restoration Pricing?
Local labor rates drive your restoration price directly: you’ll pay more in high-wage areas because crews, supervision, and overtime cost more. Lower rates can reduce bids, but availability, speed, and quality still shape final pricing.
Does Basement Flooding Cost More Than Main-Floor Flooding?
Usually, yes, basement flooding costs you more because water lingers, access is tighter, and drying takes longer. You’ll often face extra contamination cleanup, insulation removal, and structural repairs, which raise labor and material costs.
Are Emergency Response Fees Included in Restoration Estimates?
Often, yes—you’ll see emergency response fees included, but not always. You should verify whether the estimate covers dispatch, labor, extraction, and after-hours charges, because contamination, drying time, and repairs can shift your final cost.
Can Personal Belongings Be Restored Instead of Replaced?
Yes, you can often restore personal belongings instead of replacing them, but you’ll need to assess water depth, contamination, material type, drying time, and salvage value. Quick action improves outcomes and reduces replacement costs.
How Long Does a Typical Flood Damage Inspection Take?
You’ll usually spend 30 to 90 minutes on an inspection. You’ll get moisture checks, room-by-room damage notes, and contamination assessment. The more access you provide, the faster they’ll confirm drying and repair needs.
Recap
Flood restoration costs can rise fast, but you can manage them by tracking water depth, affected rooms, contamination, drying time, and material replacement. Like a rising tide, damage spreads farther than you first see, so inspect for hidden mold and structural issues early. Review your insurance policy, document every loss, and compare contractor estimates. When you act quickly and methodically, you’ll reduce waste, limit delays, and keep repair expenses from climbing out of reach.