
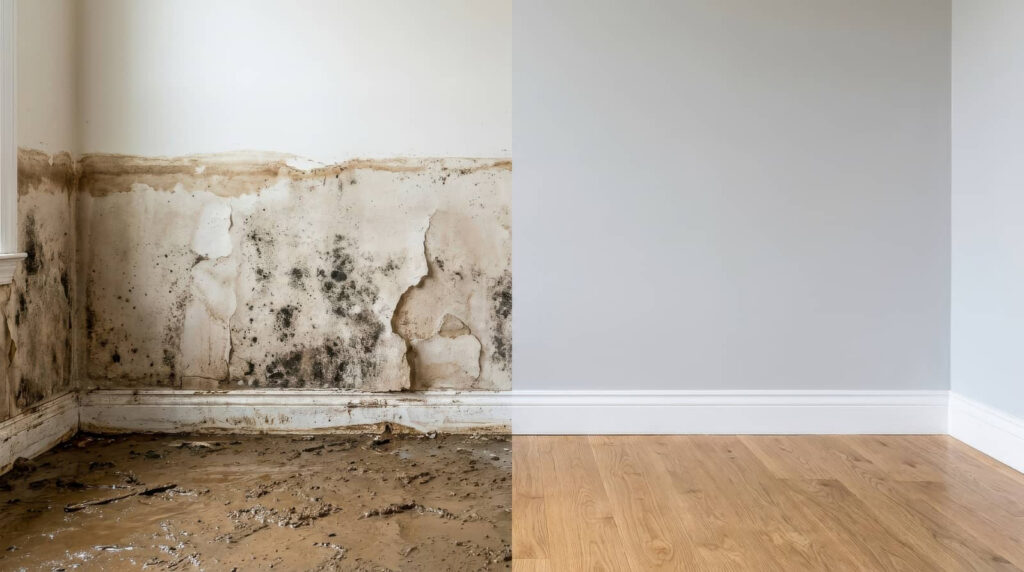
Like a hidden fault line, mold in a commercial building often signals deeper moisture problems you can’t ignore. Commercial mold remediation starts by identifying discoloration, odors, or warped materials, then tracing leaks, ventilation failures, or past water intrusion. Rapid cleanup helps limit the spread and reduce indoor air impacts. Before removal, inspect conditions, contain the affected area, filter the air, and verify that the structure is dry. The real question is whether the space stays stable after the work is done.
Key Takeaways
- Identify mold early by checking for staining, musty odors, bubbling paint, and moisture in ceilings, drywall, HVAC units, and restrooms.
- Find and stop the moisture source first, including leaks, condensation, poor ventilation, and high indoor humidity.
- Remove contaminated materials based on porosity, then clean salvageable surfaces with HEPA vacuuming and approved detergents.
- Dry all affected areas completely and verify moisture levels with calibrated meters before reconstruction or reoccupancy.
- Prevent recurrence by maintaining humidity between 30% and 50%, improving ventilation, and inspecting building systems regularly.
How to Spot Mold and Moisture Damage
Mold and moisture damage often show up first as discoloration, staining, or a persistent musty odor in high-risk areas such as ceilings, drywall, HVAC components, restrooms, and storage rooms.
You should inspect these zones for bubbling paint, warped surfaces, softened materials, and visible microbial growth. Use a flashlight, meter, and careful touch to confirm suspect conditions without spreading contamination.
In the commercial mold remediation process, you’ll document the location, extent, and material type so your team can act consistently and stay aligned.
Check around windows, plumbing penetrations, and floor boundaries for dampness or efflorescence. If you notice recurring damp spots, you’re likely seeing active moisture intrusion that needs prompt attention.
Clear records help you coordinate quickly with building staff, protect occupants, and maintain a healthy, professional environment.
What Causes Mold in Commercial Buildings?
In commercial buildings, mold develops when moisture remains in contact with porous or organic materials long enough for spores to germinate and colonies to spread.
You usually trace this to roof leaks, plumbing failures, condensation on cold surfaces, HVAC drainage issues, or intrusion through windows and foundations.
Poor ventilation can trap humid air, while inadequate insulation lets surfaces stay cool enough for condensation. High indoor humidity from occupants, equipment, or cleaning processes can also raise risk.
If you manage offices, retail suites, or shared properties, you should inspect hidden cavities, ceiling plenums, and storage areas where dampness can persist.
When you identify the source early, you protect your team, preserve building materials, and keep your space dependable for everyone who works there.
Why Mold Cleanup Can’t Wait
Once moisture takes hold, mold can begin colonizing porous materials within 24 to 48 hours, so delays quickly increase the scope of contamination and remediation costs.
You protect your building best by acting before growth spreads into wall cavities, ceiling plenums, insulation, and HVAC pathways. As colonies expand, spores can disperse through occupied areas, raising cleanup complexity and disrupting operations your team depends on.
Fast response also limits staining, odor, and material degradation that can force replacement instead of restoration. When you move quickly, you help preserve air quality, reduce tenant complaints, and keep your property aligned with health expectations.
Prompt remediation lets you stay in control, support your occupants, and avoid a small moisture event turning into a larger, more expensive structural problem.
What Inspectors Check Before Remediation
Before remediation starts, inspectors verify the source of moisture, map visible and hidden growth, and document the affected materials and locations.
You can expect them to measure humidity, compare readings across rooms, and check for leaks, drainage failures, condensation, or prior repair gaps.
They’ll review building plans, note occupancy patterns, and identify materials that may have absorbed moisture, such as drywall, insulation, ceiling tiles, carpet, and framing.
You should also expect surface sampling or air confirmation when conditions require it.
The goal is to define the scope accurately so your team shares a clear, evidence-based plan.
When you have this baseline, you’re better prepared to protect the property, support occupants, and move into remediation with confidence, coordination, and the same standard of care throughout the building.
Contain the Area and Filter the Air
Containment is the first control measure, and you should isolate the affected zone with sealed barriers, limited access points, and negative air pressure to stop spores and debris from moving into clean areas.
You then verify barrier integrity, seal penetrations, and post clear entry signage so your team knows where controlled work begins.
Use dedicated HEPA-filtered air scrubbers to capture airborne particles and maintain directional airflow from cleaner areas toward the contained space.
You should size and position units to exchange air effectively, then monitor pressure differentials throughout the job.
Keep filters installed, inspected, and replaced per manufacturer guidance so performance stays consistent.
This approach helps your crew work confidently, protects adjacent occupants, and keeps the remediation zone stable, organized, and ready for the next phase.
Remove Mold From Affected Materials
You remove affected materials based on porosity, contamination depth, and structural condition. Then, segregate items for disposal or off-site treatment.
You can salvage non-porous or semi-porous surfaces by cleaning, HEPA vacuuming, and using approved antimicrobial methods after visible growth is removed.
You document each removal method and verify that remaining materials are dry, intact, and free of residual contamination.
Material Removal Methods
Material removal methods target porous or damaged materials that can’t be effectively cleaned and restored after mold exposure. You identify affected drywall, insulation, carpet, ceiling tiles, and degraded wood, then isolate them for controlled demolition.
You cut, bag, and remove materials with minimal disturbance so you don’t spread spores into adjacent zones. You seal waste in approved containers, label it, and move it through established exit routes.
You also protect nearby building systems, furniture, and finishes with barriers and negative pressure controls. Your team follows site-specific containment protocols, PPE requirements, and disposal rules to keep the space orderly and compliant.
When you remove compromised materials promptly, you support a safer recovery path for everyone in the building and prepare the area for verification and reconstruction.
Salvageable Surface Cleaning
Once you’ve removed unsalvageable materials, the remaining hard surfaces, fixtures, and non-porous building components need careful cleaning to eliminate visible mold and residual contamination.
You should contain the work area, wear appropriate PPE, and use HEPA-filtered vacuuming to capture loose spores before wet cleaning.
Then, apply a detergent solution or approved remediation cleaner, scrub surfaces thoroughly, and wipe with clean disposable cloths.
For stubborn residue, repeat cleaning until the surface is visually clean and free of odor.
You must dry each component completely, because lingering moisture can support regrowth.
Inspect adjacent areas, including trim, shelving, and equipment housings, to confirm the cleanup meets your building’s standards.
When you follow this process, you help restore a safe, professional environment that your team and occupants can trust.
Dry and Clean the Space
You dry all remaining surfaces with controlled airflow and dehumidification to reduce residual moisture.
You then clean affected areas with appropriate methods and materials to remove dust, debris, and contamination.
You verify moisture removal with direct measurement before you return the space to service.
Dry Remaining Surfaces
After removal and containment, technicians dry all remaining surfaces to bring the space back to safe, stable conditions.
You use air movers, dehumidifiers, and controlled ventilation to reduce moisture in walls, floors, framing, and fixtures.
You monitor temperature and humidity so materials reach target drying levels without adding stress to the building.
You also check hidden cavities, baseboards, and subfloor areas where dampness can persist.
When you keep conditions dry, you lower the chance of renewed microbial activity and support a clean handoff to the next phase.
This step helps you protect occupants, preserve building materials, and restore confidence in the space.
Your team should verify dryness with meters and visual inspection before moving forward.
Clean Affected Areas
With the affected areas dried, your team can clean remaining surfaces to remove dust, debris, and residual contamination before reconstruction or reoccupancy.
Use HEPA vacuuming first, then wipe hard, nonporous surfaces with approved detergents or cleaners. Work methodically so you don’t spread particles into adjacent zones, and replace contaminated disposable materials as you go. Your crew should keep tools organized and follow site-specific containment practices so everyone stays aligned.
- Clean from top to bottom.
- Change wipes and cloths often.
- Bag removed debris immediately.
- Avoid saturating finished surfaces.
- Dispose of waste per protocol.
When you finish, the space should look orderly, support safe trade work, and reflect the standards your team expects across the property.
Verify Moisture Removal
Confirm the area is fully dry before any reconstruction or reoccupancy begins. You verify moisture removal with calibrated meters, comparing readings in affected materials to baseline conditions in adjacent, unaffected zones.
Check drywall, framing, flooring, insulation, and hidden cavities, because residual dampness can support renewed growth. Inspect HVAC components, wall voids, and subfloors for trapped moisture, and document all findings.
If readings stay elevated, continue targeted drying with dehumidifiers, air movers, and ventilation until levels stabilize.
Then clean the space to remove dust and debris left from remediation, using HEPA vacuuming and damp wiping where appropriate.
You protect the building’s future performance when you confirm dryness, record results, and release the area only after objective criteria show the structure’s moisture load has returned to acceptable conditions.
Verify the Space Is Mold-Free
Before reoccupying the area, you should verify that all visible mold has been removed and that no active moisture source remains.
You inspect affected surfaces under adequate lighting, including hidden edges, joints, and penetrations. You confirm that cleaned materials appear intact, dry, and free of discoloration or musty odor.
You also review containment records and clearance findings so your team can trust the result together. If you use a professional assessor, you compare observations against the remediation scope and note any unresolved conditions.
- Check walls, ceilings, floors, and fixtures
- Inspect adjacent rooms and shared cavities
- Confirm dry conditions with calibrated instruments
- Document photos, readings, and findings
- Release the space only after sign-off
Prevent Mold From Returning
Once the space passes clearance, you need to keep the moisture conditions that allowed mold growth from returning.
Inspect roofs, plumbing, HVAC condensate lines, and windows on a scheduled basis, and correct leaks immediately.
Keep indoor relative humidity between 30% and 50%, and use dehumidification where occupancy or climate demands it.
Maintain proper ventilation in restrooms, break rooms, and storage areas so surfaces dry fast.
Clean and dry any water intrusion within 24 to 48 hours.
Track moisture readings in vulnerable materials, and verify that repairs stay effective.
Use durable finishes and sealed penetrations to reduce hidden dampness.
Train your team to report odors, staining, or condensation early so your building community can respond before mold reestablishes.
Frequently Asked Questions
How Much Does Commercial Mold Remediation Typically Cost?
You’ll typically pay $10 to $25 per square foot, or $2,000 to $15,000 overall, for commercial mold remediation; severe contamination, hidden damage, and containment needs can push your project higher.
How Long Does the Remediation Process Usually Take?
Usually, you’ll finish remediation in 1-5 days; complex jobs can take longer. Like a surgical reset, you’ll inspect, contain, remove, dry, and verify, so you can return to a safe, healthy space.
Will Tenants Need to Vacate the Building During Cleanup?
Usually, you won’t need to vacate the building during cleanup; you’ll only relocate if contamination is extensive, HVAC systems are affected, or containment can’t isolate work areas safely, according to your remediation plan.
Do Remediation Companies Handle Insurance Claim Documentation?
Yes, they often do, and you’ll feel like the paperwork storm’s been tamed. You’ll get photos, moisture logs, scope notes, and loss summaries, so your insurer’s claim review moves faster and stays technically solid.
Are HVAC Systems Always Cleaned During Mold Remediation?
No, you don’t always clean HVAC systems during mold remediation. You clean them when contamination entered ducts, air handlers, or coils. A qualified inspector should verify conditions, then you can target cleaning, containment, and filtration appropriately.
Summary
When you address mold quickly, you protect your building’s structure and the people inside it. In one office, a small roof leak left unnoticed for 48 hours spread into wall cavities, turning a minor repair into a costly remediation. That’s the point: mold grows like a hidden spark in dry timber, then moves fast. If you inspect, remove, dry, verify, and prevent, you keep your facility safe, compliant, and operational.