
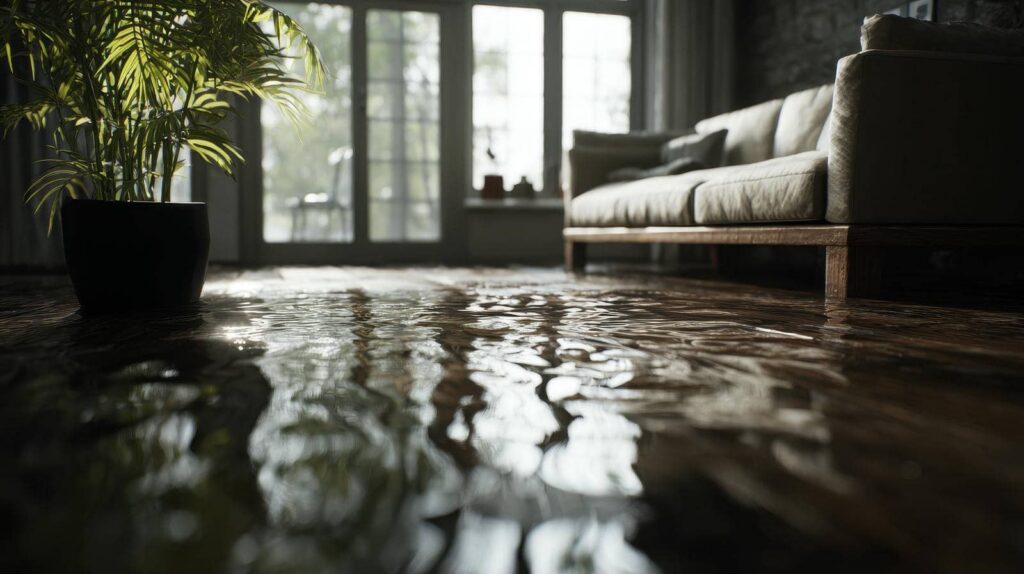
When water sneaks in, what starts as a damp spot can quickly turn into a costly water damage repair. You need to act fast, but you also need to act correctly: stop the source, assess the damage, and protect materials from further saturation. In the sections ahead, you’ll see how to identify causes, dry affected areas, watch for mold, and control repair costs before small leaks become major problems.
Key Takeaways
- Identify common causes of water damage, including leaks, roof failures, appliance overflows, broken seals, and flooding.
- Shut off the water and electricity, move belongings, and document damage immediately to reduce hazards and support insurance claims.
- Dry affected areas within 24–48 hours using pumps, vacuums, fans, and dehumidifiers to prevent hidden damage and mold growth.
- Replace porous materials with visible mold or lingering moisture, and use professional remediation for contaminated or extensive damage.
- Compare detailed repair estimates and prevent future problems with plumbing checks, gutter maintenance, dehumidifiers, and leak monitoring.
What Causes Water Damage in Homes
Water damage in homes usually starts with a few common problems: leaking plumbing, roof failures, overflowing appliances, broken seals around windows or doors, and natural flooding.
You can spot these sources by watching for stains, warped materials, musty odors, or damp surfaces.
When water enters building assemblies, it spreads through framing, insulation, and drywall, raising moisture levels and weakening finishes.
In water damage repair, you’ll often find that the source matters as much as the visible damage, because hidden saturation can keep growing behind walls and under floors.
You’re not alone when this happens; many homeowners face the same issue.
Understanding the cause helps you assess risk, protect your space, and move forward with confidence and a clear plan.
Stop the Leak and Protect Your Home
Shut off the water source as soon as you can to limit further damage and make the area safer to inspect. If the leak comes from a fixture, close the local valve; if it’s from a supply line or appliance, turn off the main shutoff.
Then cut power to any wet area if you can do it safely, because moisture and electricity don’t mix. Move belongings, rugs, and small furniture away from the leak path so water can’t spread into adjacent rooms.
Place buckets, towels, or a wet vacuum under active drips to control runoff. You’re not alone here—quick, calm action helps protect your home and keeps repair costs lower.
Once the water stops, keep doors and windows open for airflow and reduce humidity with fans or a dehumidifier.
Assess Damage Before Cleanup
Before you start cleaning, take a careful look at what the water touched so you can plan the right repair. Check walls, floors, baseboards, insulation, and nearby furniture for staining, swelling, or soft spots.
Note whether the water came from a clean source or from a sewer, appliance, or storm, since that affects the level of risk. Use a flashlight to inspect corners, closets, and under cabinets, where moisture often hides.
If you belong to a household with multiple people, keep everyone informed so you can coordinate safely and avoid missed damage. Take photos and write down what you see; this record helps you track progress and communicate with contractors or insurers.
A careful assessment now gives you control and helps your home recover more reliably.
What Happens During Water Damage Repair
During water damage repair, you’ll first see technicians extract standing water with pumps, vacuums, and other specialized equipment to stop further saturation.
Next, they’ll dry and dehumidify affected areas with air movers and dehumidifiers while monitoring moisture levels to prevent hidden damage and mold growth.
Once the structure is stable, they’ll complete repairs and restoration, replacing damaged materials and returning your home to a safe, usable condition.
Water Extraction Process
Once a technician assesses the damage, they’ll start water extraction to remove standing water as quickly as possible and reduce further harm to your home.
You’ll see them use powerful pumps, truck-mounted vacuums, and portable extractors to pull water from carpets, subfloors, and hard surfaces. They’ll check hidden areas, such as under cabinetry and inside low spots, where water can collect and spread.
By removing bulk water first, they help limit swelling, staining, and contamination. You can expect them to work methodically, protecting salvageable materials and separating items that need special handling.
This step also gives your restoration team a clear picture of what’s affected, so they can guide you through the next phase with confidence and keep you informed throughout the process.
Drying And Dehumidifying
After the bulk water is removed, the crew sets up drying equipment to pull moisture out of materials and indoor air as quickly and evenly as possible. You’ll usually see air movers directed across wet surfaces and dehumidifiers working continuously to lower humidity.
This controlled airflow helps water leave carpet, drywall, and framing without trapping it inside. Technicians also check temperature, adjust placement, and monitor moisture readings so the drying plan stays on track.
- Airflow speeds evaporation from damp materials
- Dehumidifiers capture moisture before it condenses again
- Moisture meters verify progress and prevent hidden dampness
You’re not just waiting; you’re joining a careful process that protects your home’s structure and indoor air quality.
Consistent monitoring keeps everyone informed and reassured.
Repairs And Restoration
When moisture readings show the structure is dry enough, the repair phase starts with a careful assessment of what can be saved and what needs removal.
You’ll see technicians remove unsalvageable drywall, insulation, trim, and flooring, then sanitize the exposed framing to reduce microbial risk. They’ll repair or replace damaged pipes, wiring, subflooring, and structural members as needed, always checking that every fix meets code.
Next, they’ll rebuild surfaces with matched materials, tape seams, seal joints, and prep for paint or finish work. If your contents were affected, they may clean, deodorize, and restore furniture too.
Throughout the process, you’re part of a team that wants your home safe, stable, and familiar again, with each step documented so you can track progress confidently.
Dry Out Walls, Floors, and Belongings
You’ll dry walls with controlled airflow, dehumidifiers, and, when needed, selective material removal so moisture can escape before mold starts.
For floors, you’ll lift wet carpets or pads, extract standing water, and monitor subfloor moisture until readings return to safe levels.
You can often salvage belongings by sorting items quickly, cleaning and disinfecting nonporous materials, and air-drying porous items only if they haven’t stayed wet too long.
Wall Drying Methods
Wall drying starts with removing standing water, then using high-capacity air movers and dehumidifiers to pull moisture out of drywall, subfloors, and nearby materials before it spreads deeper into the structure.
You’ll want technicians to map wet areas, drill small inspection holes if needed, and track moisture with meters until readings return to safe levels. This keeps hidden dampness from feeding mold or warping framing, and it helps your home feel stable again.
- Position air movers to create steady crossflow
- Run dehumidifiers until humidity drops and stays low
- Check wall cavities, baseboards, and seams daily
With prompt drying, you protect the structure and stay part of a house that’s recovering well.
Salvaging Wet Belongings
Salvaging wet belongings starts with quick sorting so you can separate items that can dry out from those that need disposal or specialist cleaning.
Move porous items, like paper, fabric, and cardboard, to a clean, ventilated space. Remove cushions, open drawers, and elevate furniture to improve airflow.
Blot surfaces gently; don’t rub, because that can spread contamination and damage fibers. For hardwood, metal, and plastic, wipe away moisture, then dry with fans and dehumidifiers.
Wash salvageable clothing and linens in hot water if the source was clean. Bag saturated insulation, mattresses, and moldy items for disposal.
Label keep, clean, and discard piles so you stay organized. You’re protecting your home, preserving what matters, and giving your belongings the best chance to recover.
When Mold Becomes a Water Damage Problem
When moisture lingers after a leak, flood, or burst pipe, mold can quickly turn a simple water damage repair into a more complex remediation job. You’ll usually notice it in damp drywall, hidden insulation, or musty odors that keep returning after drying.
Mold feeds on organic materials and spreads fast in humid, enclosed spaces, so you need to act early and thoroughly.
- Remove standing water and dry materials within 24–48 hours.
- Isolate affected rooms to reduce spore spread.
- Replace porous materials that stay damp or show growth.
If you’ve already spotted visible mold, don’t just clean the surface and hope for the best. You deserve a home that feels safe, and a complete repair includes moisture control, containment, and proper cleanup so the problem doesn’t come back.
What Affects Water Damage Repair Costs
Water damage repair costs depend on how far the moisture spread, how long the materials stayed wet, and what type of water you’re dealing with.
You’ll usually pay less when the damage stays in one room and you act quickly, because crews can dry surfaces before they break down. Costs rise when water reaches subfloors, insulation, drywall, or electrical systems, since those materials often need removal and replacement.
Clean water is simpler to handle than gray or black water, which requires stricter cleanup and protective procedures. Labor, equipment, and disposal fees also affect the bill.
If you’re comparing estimates, ask what each company includes so you can make an informed choice and feel confident you’re getting the right level of care for your home.
Prevent Future Water Damage After Repairs
Once repairs are complete, a few preventive steps can help keep moisture from coming back and causing another round of damage. You can protect your home by checking plumbing, sealing gaps, and monitoring humidity.
Inspect under sinks, around toilets, and behind appliances for drips or corrosion. Keep gutters clear, extend downspouts, and confirm grading slopes away from your foundation. Use dehumidifiers and exhaust fans in damp rooms to control condensation.
- Test sump pumps and backup power regularly.
- Replace worn hoses, caulk, and weatherstripping promptly.
- Review your water bill for hidden leaks.
These habits help you stay ahead of problems and keep your home safe, dry, and comfortable. With consistent maintenance, you’ll join the homeowners who catch issues early and avoid costly repeat repairs.
Frequently Asked Questions
How Long Does Water Damage Repair Usually Take?
You’ll usually need 3–7 days for drying, then another few days to weeks for repairs. Severity, materials, and mold risk affect timing. Act fast, and you’ll limit damage and get your home back sooner.
Can I Stay in My Home During Water Damage Repair?
Yes, you can sometimes stay home during repairs if the damage is limited and crews contain affected areas. You’ll need safe power, dry air, and low mold risk; severe flooding often requires temporary relocation.
Will My Insurance Cover All Water Damage Repairs?
Not always. You’ll usually get coverage for sudden, accidental damage, but not for neglect or flooding unless you bought extra protection. You should review your policy, document losses, and call your insurer fast.
Do I Need Professional Help After a Small Leak?
Yes, you should if the leak soaked drywall, insulation, or flooring. You can dry minor surface moisture yourself, but pros find hidden damage, prevent mold, and keep your home’s structure safe.
How Can I Tell if Hidden Water Damage Remains?
You’ll spot hidden water damage by checking for musty odors, warped surfaces, stains, soft drywall, and elevated moisture readings. If your meter insists everything’s fine while your walls politely rot, call a professional.
Conclusion
By acting quickly, you can limit water damage and keep a small problem from becoming a costly headache. Shut off the source, document the damage, and dry affected areas thoroughly to reduce structural and mold risks. If the damage is extensive, bring in a professional to help you restore your home safely. After repairs, inspect plumbing, roofing, and drainage regularly so you’re not caught flat-footed when the next leak appears.