
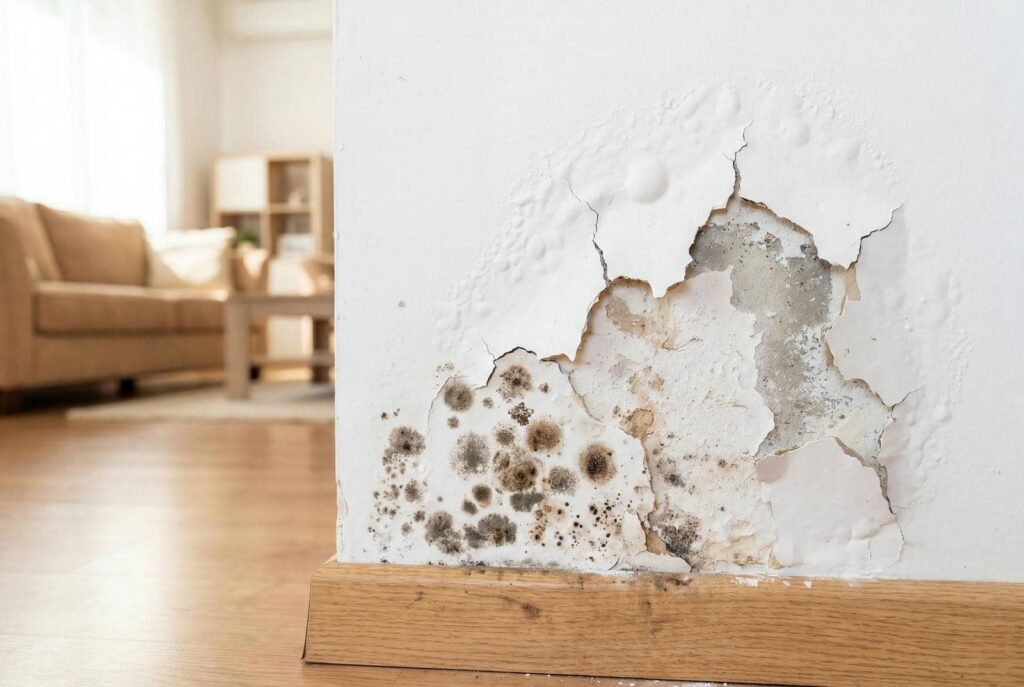
Most basements in flood-prone homes show some water-related damage at some point, and drywall often takes the hit first. Drywall Repair helps determine when drying is enough and when replacement is the safer option, because hidden moisture can lead to mold, sagging, and structural problems. The signs aren’t always obvious, and the right repair depends on what’s happening behind the wall.
Key Takeaways
- Stop the water source immediately and remove wet items to prevent further drywall damage.
- Dry lightly wet drywall quickly with fans, dehumidifiers, and open windows for better salvage chances.
- Watch for swelling, stains, soft spots, peeling paper, or separated seams as signs of repair needs.
- Avoid using wet electrical circuits and wear protective gear when inspecting or removing damaged drywall.
- Replace drywall if it sags, crumbles, stays soft, or shows mold, and call a restoration professional if needed.
What Water Damage Does to Drywall
Water damage can quickly weaken drywall by soaking into the gypsum core, softening the surface, and causing it to swell, stain, or crumble.
You may notice the paper facing loosening, joint tape lifting, and fastener heads becoming visible as moisture changes the board’s structure.
Because drywall absorbs water readily, the panel can lose rigidity and support paint, texture, and trim less effectively.
If you’re managing drywall repair after water damage, you’re addressing both surface finish and hidden material loss.
In a well-kept home, these changes can spread beyond the wet spot, especially when humidity stays high.
When Drywall Repair After Water Damage Is Needed
Drywall repair after water damage is needed when the panel stays soft, stained, swollen, or brittle after the source is fixed and the area has dried.
You should plan repair when the surface no longer feels rigid, the paper face is peeling, or seams have separated. Those signs tell you the material’s strength is compromised, and patching won’t hold reliably.
- Buckling or sagging that changes the wall line
- Dark spots, rings, or recurring discoloration
- Crumbling edges, torn paper, or joint failure
If the damage is limited, you may only need a cutout and patch.
If the area is widespread, replacement gives you a cleaner, safer result. You’re not alone here; this is a normal restoration step.
When Water-Damaged Drywall Can Dry Out
If the drywall only got briefly wet and the source is fixed, you may be able to dry it out instead of replacing it. You should act fast: open windows, run fans, and use a dehumidifier to pull moisture from the room.
Keep air moving across both sides of the wall if you can safely access them. Check the surface for cool spots, discoloration, or a musty smell, which can mean moisture is still trapped.
You’ll want the room’s relative humidity low and the temperature steady so drying stays consistent. In many homes, drywall that feels firm and shows no swelling can recover with careful drying.
If you stay organized and monitor conditions each day, you’re giving your home the best chance to bounce back.
When Drywall Must Be Replaced After Water Damage
When the drywall has soaked up a lot of water, broken down, or started to grow mold, you’ll usually need to replace it instead of trying to save it. You can often spot this when the panel sags, crumbles, or stays soft after drying.
Replacing damaged sections helps protect your walls and your home’s air quality.
- Large stains that keep spreading
- Panels that feel mushy or warped
- Mold growth, even in small patches
If water reached the paper face, gypsum core, or insulation behind the wall, the material may no longer hold up. You’re not overreacting by removing it; you’re choosing a safer, cleaner fix.
With a solid replacement, you can restore your space and feel confident again.
What Pros Inspect Before Repairing Drywall
Before you repair drywall, a pro checks the moisture source to make sure the leak or intrusion is fully stopped.
They also assess structural damage to confirm the wall framing, insulation, and fasteners are still sound.
Then they look for mold and staining so you know whether cleanup or material removal is needed before patching begins.
Moisture Source Check
A proper moisture source check starts with finding exactly where the water came from, how far it spread, and whether the source is still active.
You want pros to trace leaks, condensation, or overflow before they touch the drywall, because repair won’t hold if moisture keeps feeding the damage. They’ll use meters, infrared tools, and close visual inspection to confirm hidden dampness and map the affected area.
- Check plumbing, roof, windows, and appliances
- Verify the source is fully stopped
- Measure moisture in drywall and nearby materials
Once they identify the cause, you can move forward with confidence.
That step helps protect your home, your repair budget, and your peace of mind.
Structural Damage Assessment
Once the moisture source is under control, pros assess whether the drywall damage is only cosmetic or tied to bigger structural issues. They’ll tap walls, check for soft spots, and measure how far the moisture traveled into studs, insulation, and framing.
You can expect them to look for sagging ceilings, warped joints, separated trim, or fasteners that have loosened as materials expanded and dried unevenly. They also inspect nearby floors, baseplates, and load-bearing members to confirm the wall still supports itself safely.
If the structure is sound, you’re usually looking at targeted drywall removal and replacement, not a full rebuild. This step helps your crew protect your home, avoid hidden failures, and give you a repair plan that fits your space and your budget.
Mold And Staining
Mold and staining often tell pros how long the drywall stayed wet and whether hidden moisture is still a problem. You’ll usually see brown rings, yellow blotches, or fuzzy growth around seams, baseboards, and outlets.
Inspectors check:
- whether the stain feels dry or damp
- if mold is surface-level or deeper in the paper face
- whether nearby insulation, framing, or trim also show damage
If the discoloration is active, they may open the wall to test moisture and airflow before repairs begin. That helps you avoid sealing in contamination and protects your home’s indoor air.
You’re not alone in this process—good restoration teams explain what they find, why it matters, and when drywall can be cleaned, dried, or replaced safely.
How Drywall Repair Fits Into Water Damage Restoration
You’ll need to assess drywall as soon as the area is safe, because timing affects whether the material can be dried, cleaned, or must be removed.
In a proper restoration sequence, you first stop the leak, dry the structure, and verify moisture levels before you start any drywall repair.
When you follow that order, you reduce hidden damage, improve repair quality, and help the wall return to a stable condition.
Drywall Assessment Timing
After water damage, drywall repair should wait until you’ve confirmed the affected area is fully dry and stable, because restoration has to address moisture first and structural damage second.
You’ll protect your home best when you assess drywall only after humidity levels normalize and surfaces no longer feel damp. That timing helps you avoid trapping moisture inside wall cavities, where hidden damage can spread.
- Check for soft spots, swelling, or crumbling edges.
- Use a moisture meter to verify the wall is dry.
- Confirm framing and insulation behind the drywall aren’t compromised.
When you take this measured approach, you’re making a smart, standard restoration choice that keeps your space safe and your repair results dependable.
You’re not alone in this process; careful timing builds confidence and better outcomes for your home.
Restoration And Repair Sequence
Drywall repair fits into water damage restoration only after the source of moisture is stopped, the area is dried, and damaged materials are evaluated for removal or salvage.
You then verify moisture levels in framing, insulation, and adjacent finishes so you’re not sealing in hidden damage.
Next, you remove unsalvageable drywall, treat any microbial growth, and replace wet insulation or compromised fasteners.
Once the cavity is clean and dry, you can install new drywall, tape joints, apply compound, and sand between coats.
After priming, you match texture and paint for a uniform finish.
This sequence protects your home and keeps your repair team working efficiently.
When you follow it, you join the homeowners who restore safely, prevent repeat damage, and get lasting results.
How to Prevent More Water Damage
To prevent more water damage, stop the source of moisture as soon as possible and keep the affected area dry. Shut off the supply line, patch roof leaks, and clear standing water before it spreads into insulation or framing.
You can protect your home and feel confident by acting fast with simple controls.
- Remove wet items and set them in a dry, ventilated space.
- Run fans and a dehumidifier to lower humidity.
- Check nearby walls, ceilings, and floors for fresh stains or soft spots.
Seal openings with plastic if rain’s still possible, and don’t turn on electrical circuits in wet areas.
If the damage keeps growing, call a licensed restoration professional. You’re not alone; quick, careful steps help your home recover safely.
Frequently Asked Questions
How Long Does Drywall Repair After Water Damage Usually Take?
Usually, you’re looking at 1–3 days for small repairs, but larger damage can take a week or more. You’ll need drying, patching, sanding, and painting, so timing depends on moisture, extent, and accessibility.
Can Painted Drywall Be Repaired Without Removing the Paint?
Yes, you can repair painted drywall without removing all the paint if damage is minor. You’ll need to clean, patch, sand, and prime the area so you get a smooth, long-lasting finish that blends well.
Does Insurance Typically Cover Water-Damaged Drywall Repair?
Usually, yes, if a covered event caused it. You should review your policy, document the damage, and file promptly. If neglect or flooding exclusions apply, you’ll likely pay out of pocket.
Should Mold Testing Happen Before Drywall Repair Begins?
Yes—you should test first. Think of mold like a hidden shadow; you’ll want clear evidence before you cut. You’ll protect your home, keep your crew safe, and repair only what’s truly damaged.
Can I Stay in My Home During Drywall Repair Work?
Yes, you can often stay home during drywall repair if crews isolate the work area and ventilation’s controlled. You’ll need to avoid the space, protect belongings, and leave if mold, dust, or structural damage makes conditions unsafe.
Summary
If you catch water damage early, you can often save drywall and avoid bigger repairs. Many homes have experienced some kind of water damage, so you’re not alone in dealing with it. Dry, firm drywall may recover, but soft, swollen, or moldy sections usually need replacement. When you act quickly, inspect thoroughly, and bring in a pro when needed, you help protect your home’s structure, air quality, and long-term value.