After a pipe burst behind your kitchen wall, your adjuster will want more than a damage summary—you need insurance documentation, leak detection reports, dated photos, moisture readings, repair notes, and restoration records that show what happened and when. If you organize each item by date and label it clearly, you make the claim easier to review and strengthen your position, but the details that matter most often come down to what you document first.
Key Takeaways
- Take clear photos of all damage, including wide room shots, close-ups, and visible leak sources before cleanup.
- Record moisture readings immediately and over time, noting the date, room, and device used.
- Keep repair notes from plumbers, mitigation crews, and contractors describing damage, cause, and work completed.
- Document leak detection, response times, and mitigation efforts to show prompt action and claim validity.
- Organize all records chronologically with dates, locations, and room names for easy adjuster review.
What Adjusters Need First
Adjusters usually need the essentials first: clear photos of the damage, moisture readings, and a simple timeline of what happened.
You should gather insurance documentation for water damage that shows when you noticed the leak, when you called for help, and what you did to limit further loss.
Keep repair notes from plumbers, mitigation crews, and contractors, since they help confirm the scope and cause.
Include meter readings, dates, and room names so the file stays organized and easy to review.
When you present complete records, you make the claim process smoother and show you’re handling the loss responsibly.
That clarity helps the adjuster understand your situation quickly and keeps you aligned with the rest of your team.
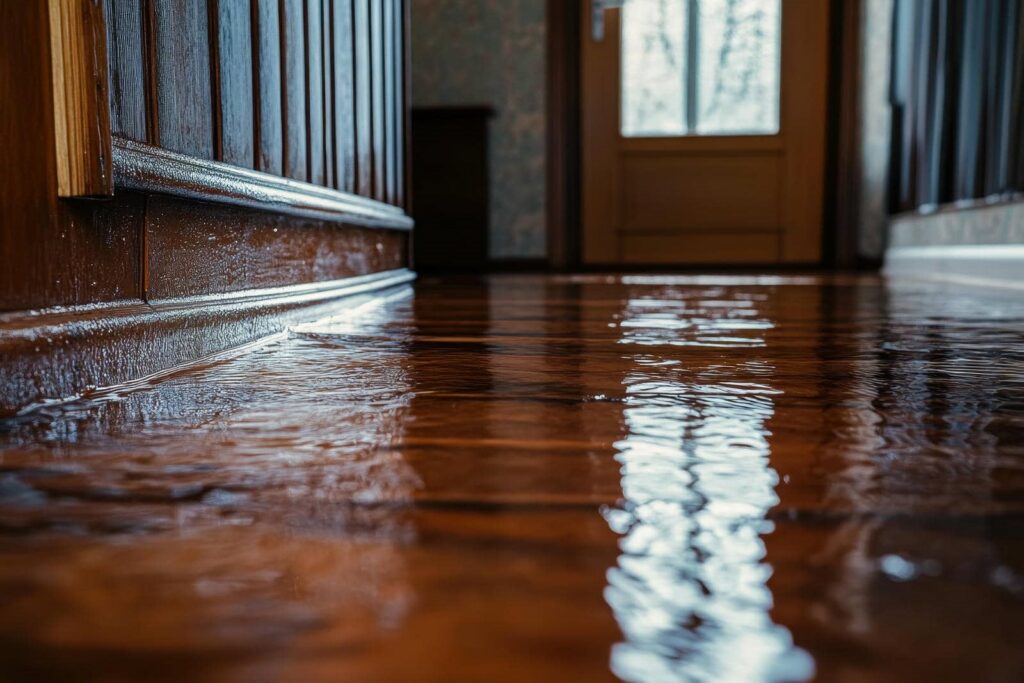
Photos for Your Water Damage Claim
Good photos can make your water damage claim easier to review because they show the condition of each affected area before cleanup, drying, or repairs begin.
You should take wide shots of every room, then close-ups of damaged walls, floors, ceilings, furniture, and belongings. Include entry points such as burst pipes, roof leaks, or appliance failures if you can safely do so.
Use good lighting, and keep each image sharp and uncluttered. Photograph serial numbers, labels, and any visible staining, warping, or debris.
Take pictures from several angles so your adjuster can understand the full scope. Save the original files, note the date, and organize them in a shared folder.
When you document clearly, you help your claim team support your case together.
How to Use Moisture Readings
You should establish baseline moisture readings as soon as possible after the damage is found, so you can compare them with later measurements.
Track changes in the same locations over time to show whether moisture levels are dropping or staying high.
Record each reading with the date, room, and device used to document drying progress clearly for your claim.
Establish Baseline Readings
Before repairs begin, take moisture readings to establish a clear baseline for the affected area. You’re building a record that helps everyone involved understand the starting condition. Use the same meter, measure the same spots, and note the date, time, and room location. Include readings from wet materials, nearby dry surfaces, and unaffected areas for comparison.
- Mark each test point on a floor plan or photo.
- Record the exact reading and unit of measure.
- Note surface type, such as drywall, wood, or tile.
- Add any visible damage that may affect interpretation.
When you document consistently, you support your claim and help your restoration team stay aligned.
Clear baseline data makes your file stronger and your next steps easier.
Track Moisture Changes
Track moisture changes by taking readings at the same locations on a consistent schedule and comparing each set against your baseline.
Use the same meter, probe depth, and measurement points each time so your results stay consistent and credible. Note the date, time, location, and reading value for every check, and keep units clear.
If you measure walls, floors, or cabinets, label each area the same way in every entry so you can follow progress without confusion. Look for steady declines toward normal levels, and flag any spikes that may signal hidden moisture or delays.
Clear, repeatable readings help you and your adjuster stay aligned, reduce disputes, and show that your claim documentation reflects real conditions.
Record Drying Progress
Use moisture readings to show drying progress by comparing each new measurement with your baseline and the prior check. You give your adjuster a clear story when you log numbers from the same locations each day.
Note the tool, room, date, time, and surface type so your records stay trusted. As levels drop, you can prove the work is moving forward and your team’s plan is working.
Measure every affected area.
Mark the exact meter points.
Photograph the reading screen.
Add brief notes on equipment, temperature, and humidity.
If a reading stalls or rises, flag it right away and record the action you took. This helps your claim file stay organized, complete, and easy to support.
Repair Notes That Support Your Claim
Repair notes help show exactly what work was done, when it was done, and why it was necessary for the water damage claim. You should keep notes for each visit, including the date, the crew member’s name, the affected rooms, and the specific actions taken.
Note materials removed, surfaces cleaned, repairs made, and any parts that couldn’t be saved. If work changed because hidden damage appeared, record that too. Use plain, direct language so adjusters can follow the timeline without confusion.
You’ll strengthen your claim when your notes match photos, invoices, and your own observations. Keep copies in one folder so you and your family can track the repair process together.
Clear notes help you show that the work was needed, reasonable, and tied to the loss.
Restoration Records That Help Your Claim
Restoration records show the full scope of the mitigation and cleanup work after water damage, including what was inspected, dried, removed, cleaned, and monitored. You can use these records to show your insurer that the job was handled carefully and completely. They help prove the damage wasn’t left open or ignored.
- Drying logs that list equipment used and affected areas
- Moisture readings that track progress and remaining problem spots
- Cleaning and sanitation notes for materials and surfaces
- Final sign-off records showing completion of mitigation work
When you keep these details, you strengthen your claim and show you’re part of a prepared, responsible homeowner community.
Clear restoration records make it easier for your adjuster to understand what happened and why the loss deserves fair coverage.
Organize Documents by Date
When you organize water damage documents by date, you create a clear timeline that helps your insurer connect the photos, moisture readings, repair notes, and restoration records to each stage of the loss.
Put each item in order from the first leak report through final repairs, and label every file with the date, location, and what changed.
Keep phone photos, contractor estimates, drying logs, and email updates in one folder or binder, then group duplicates together. This makes it easier for the adjuster to verify damage progression and respond quickly.
If you add new evidence later, insert it where it belongs instead of attaching it at the end. A dated record helps you stay organized, feel confident, and present your claim as part of a well-documented process.
Frequently Asked Questions
How Long Does a Water Damage Claim Usually Take?
You’ll usually wait 2 to 8 weeks for a water damage claim, depending on damage severity, insurer response, documentation, and repairs. If you submit photos, readings, and notes quickly, you can speed things up.
Can I File a Claim Without an Emergency Plumber Report?
Yes, you can, but it’s like building a case with one missing brick. You’ll need photos, moisture readings, repair notes, and restoration records. Your insurer may still ask for a plumber’s report later.
Will My Insurer Cover Mold Removal After Water Damage?
Maybe, if your policy covers sudden water damage and mold cleanup. You’ll need to show prompt mitigation, photos, moisture readings, and repair records. Delays, neglect, or preexisting mold often lead to denial.
Do I Need Receipts for Temporary Repairs and Lodging?
Absolutely—you’ll want receipts. Keep proof for temporary repairs and lodging, since insurers usually reimburse documented expenses. Save invoices, hotel bills, and dates; without them, your claim may feel like chasing smoke.
What if the Water Damage Was Caused by a Burst Pipe?
A burst pipe usually counts as a covered sudden event, so you’ll report it fast, document the damage, and keep repair receipts. You’ll also show photos, moisture readings, and restoration notes for support.
Wrap-Up
Good insurance documentation for water damage claims helps you move your claim forward with less delay. You should give adjusters the first leak report, clear photos, moisture readings, and repair notes from plumbers and contractors. For example, if a pipe burst at 2 a.m., a dated photo and a plumber’s note showing the shutoff time can prove fast response and reduce disputes. Keep everything organized by date so your claim’s easier to review.