
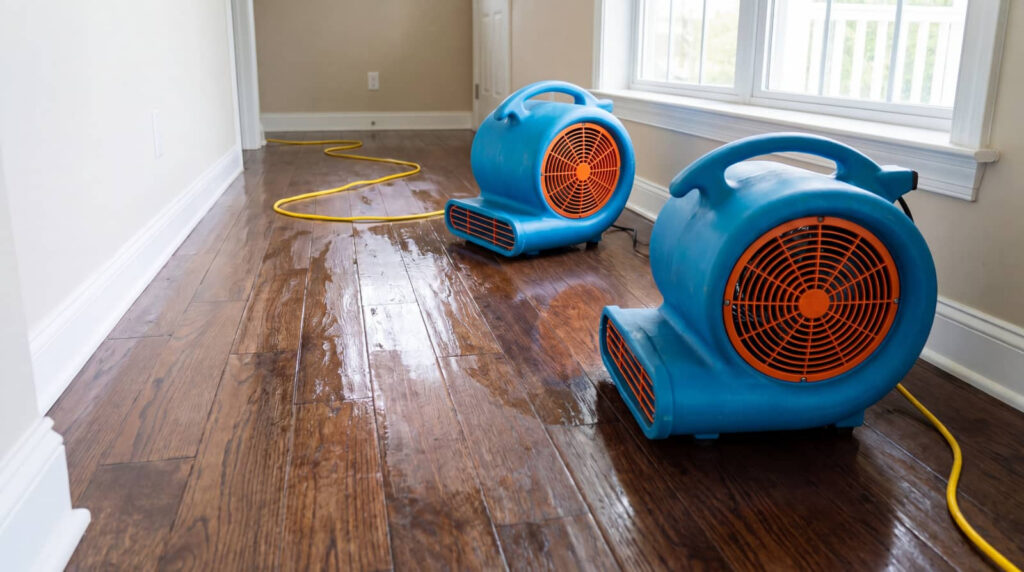
When water leaves its mark like a silent breach, you need to act fast on damaged baseboards. You’ll want to trace the moisture source, dry the area fully, and judge whether the trim is only stained and swollen or soft and warped. Minor damage can often be repaired, but compromised boards and hidden wall issues usually call for replacement. The difference is in the details, and they matter.
Key Takeaways
- Determine whether the baseboard is repairable by checking for warping, softness, swelling, or persistent staining.
- Dry the area completely with fans, dehumidifiers, and removed trim before any repair or replacement.
- Repair only superficial damage by removing loose paint, filling dents, sanding smooth, priming, and repainting.
- Replace sections that are warped, split, delaminated, or softened, especially MDF damaged by moisture.
- Inspect drywall, subfloor, plumbing, and hidden cavities for trapped moisture or mold before reinstalling new trim.
Repair or Replace Water-Damaged Baseboards?
Whether you should repair or replace water-damaged baseboards depends on how far the moisture has penetrated and what the trim is made of.
If you catch the issue early, you can often complete water damaged baseboard repair by removing the board, drying the back, and sealing small splits with wood filler or epoxy.
Solid wood usually responds better than MDF, which swells and crumbles once it absorbs water.
You should replace any section that’s warped, softened, or losing fasteners, because patching won’t restore strength or fit.
Before reinstalling, check the drywall and subfloor edge for trapped moisture so you don’t invite hidden damage back into your home.
When you choose the right fix, you protect your wall assembly and stay confident with the rest of your crew.
What Water Damage Looks Like on Baseboards
When you inspect baseboards for water damage, look for visible warping, staining, and swelling along the lower edges and joints.
You’ll often see paint bubbling, discoloration, or soft spots where moisture has soaked into the material.
These signs usually mean the trim has absorbed water and may no longer sit flush against the wall.
Visible Warping
Visible warping is one of the clearest signs that a baseboard has taken on too much moisture. You’ll notice the trim bow outward, cup inward, or pull away from the wall instead of sitting flat.
Use a straightedge to check for gaps, and inspect the full length, especially near corners and seams where movement shows first. Warped boards often feel distorted when you press them, and they may no longer meet the floor evenly.
In a moisture intrusion scenario, you can’t ignore this change in shape, because the board has likely lost dimensional stability.
If the warp is slight and the wood is still sound, targeted drying and repair may help. If the distortion keeps growing, you’re usually looking at replacement, not a quick fix, for a lasting result.
Staining And Swelling
Staining and swelling often show up together after a baseboard has absorbed moisture. You’ll usually see discoloration near the bottom edge, where water wicks in from floors, leaks, or damp drywall behind the trim.
The stain may look yellow, brown, or gray, and it can spread unevenly along the board. As the fibers take on water, the profile expands, edges lift, and joints may open. You might also notice soft spots when you press the surface.
If the finish blisters or the paint darkens, moisture is still active. Check nearby walls, too, because hidden intrusion can keep feeding the damage.
Catching these signs early helps you and your crew decide whether drying, sealing, or full replacement makes sense before rot sets in.
Signs You Can Repair Baseboards
You can usually repair a water-damaged baseboard if the trim still holds its shape and the damage stays superficial.
Check for localized discoloration, slight edge swelling, and a firm surface that doesn’t crumble when you press it. If the board stays securely fastened to the wall, you can often clean, dry, sand, and refinish it instead of replacing it.
You should also inspect the caulk line and paint film; minor separation or bubbling often signals repairable moisture exposure.
Look for tight joints at corners and seams, because a board that still fits cleanly usually responds well to patching.
When you see these signs, you’re in a good spot to restore the trim and keep your space looking cared for and cohesive.
When Baseboard Replacement Is Necessary
Replacement becomes the better option when the baseboard has lost its structural integrity or the moisture damage goes beyond the surface.
You’ll notice this when the trim feels soft, swells at the edges, crumbles under light pressure, or no longer holds nails securely. If the profile has warped, split, or delaminated, patching won’t restore a clean, durable fit.
You should also replace sections with persistent staining that won’t sand out, because trapped moisture can weaken the material from within.
When you install new baseboard, choose a moisture-resistant product and match the existing height and profile so the room still feels cohesive.
That way, you protect the finish, keep the wall line sharp, and stay in control of a repair that’s built to last.
Find the Leak Before You Fix Trim
Before you repair or replace damaged trim, trace the source of the moisture so the problem doesn’t come back. Start by checking nearby plumbing, exterior walls, windows, tubs, toilets, and appliance lines.
Look for stains, soft drywall, swollen flooring, peeling caulk, or rusted fasteners that point to an active path. Run fixtures one at a time and watch for drips or seepage at joints and penetrations.
If you suspect hidden leakage, use a moisture meter to map the wet area and identify the highest readings near the source. Seal failed caulk, tighten fittings, or call a plumber before you reinstall baseboard.
When you fix the cause first, you protect your trim, your wall assembly, and the rest of your home team from repeat damage.
Dry Out Moisture Behind Baseboards
You’ll need to detect hidden moisture behind the baseboards with a moisture meter or by checking for damp drywall, soft trim, and musty odors.
Increase air circulation by running fans, opening windows, and using a dehumidifier so the wall cavity dries faster.
If moisture remains trapped, remove baseboard sections to expose the area and let the framing and wall surface dry completely.
Detect Hidden Moisture
When water reaches a baseboard, the visible stain is often only part of the problem, so check for hidden moisture before you repair or replace anything.
You can use a moisture meter on the trim, drywall, and nearby flooring to spot damp zones that look dry. Press gently along the lower wall; soft drywall, swelling, or a cool feel can signal trapped water.
Remove a small section of caulk or lift the baseboard edge if needed to inspect the back side. Look for discoloration, musty odor, and darkened framing.
If readings stay elevated, keep the area isolated from finish work and verify the source is fixed. You’re not alone in this step; careful checking now helps your repair hold up and protects the wall cavity from later damage.
Increase Air Circulation
Once you’ve confirmed there’s no hidden wet spot still feeding the damage, start drying the area by moving air across the baseboard and the lower wall.
Position a box fan or oscillating fan so it pushes air parallel to the trim, not straight at one point. Keep the HVAC running if it helps dehumidify the room, and open interior doors to prevent stagnant pockets.
If the space feels humid, add a dehumidifier nearby and empty it often. You want steady airflow, not heat spikes, because excess heat can warp trim and trap moisture deeper in the wall.
Check for cool, damp spots with your hand each day. As the surface dries, you’ll give your repair a cleaner, safer foundation and protect the whole room.
Remove Baseboard Sections
Carefully remove the affected baseboard sections so the wall cavity can dry out completely. You’ll prevent trapped moisture from feeding mold, swelling drywall, and weakening adhesive bonds. Use a utility knife to score caulk, then pry slowly to avoid damaging studs or finish surfaces. Label each piece if you plan to reinstall it.
Inspect the back of each section for staining, rot, or delamination.
Check the drywall edge and subfloor for dampness before closing anything up.
Place the removed trim in a dry, ventilated area so it can stabilize.
Replace any piece that’s cracked, swollen, or no longer fits tightly.
When you work methodically, you protect the wall system and keep your repair in the same dependable shape your home deserves.
How to Repair Water-Damaged Baseboards
If the water damage is minor and the baseboard is still structurally sound, you can often repair it by drying the area completely, removing any loose paint or softened material, and filling small dents or gouges with a wood filler or epoxy.
Once the patch cures, sand it flush with the surrounding profile, then wipe away dust so your finish bonds well. Apply a bonding primer to seal the repaired spots and help the paint grip evenly.
If the original surface is still intact, you can spot-paint the repair; otherwise, repaint the full length for a uniform result.
Reinstall the baseboard with clean fasteners and a thin bead of paintable caulk along the top edge. That keeps your trim looking tight, professional, and part of the room.
Check for Wall Damage Under the Trim
Remove the baseboard and check the wall surface for hidden moisture, especially around the lower plate and any stained areas.
Press the drywall gently to see if it feels soft, swollen, or crumbly, since that usually means the wall has absorbed water and may need repair.
Look closely for mold growth, because even small patches can signal ongoing moisture behind the trim.
Inspect Hidden Wall Moisture
Before you repair or replace water-damaged baseboard, inspect the wall behind the trim for hidden moisture and damage, because wet drywall or plaster can make a simple trim problem turn into a larger wall repair.
Use a moisture meter on the exposed wall line, especially near corners, seams, and fasteners. If you’re working with a trusted crew or on your own, keep the area open long enough to confirm it’s dry.
- Check for damp insulation at the perimeter.
- Look for staining that spreads above the trim.
- Verify caulk joints aren’t trapping water.
- Record readings so you can compare after drying.
If moisture lingers, pause installation and fix the source first. That way, you protect the wall, the trim, and your team’s work.
Look For Soft Drywall
Once you’ve confirmed the area is dry, check the drywall behind the baseboard for softness, swelling, or crumbling edges, because water can weaken the wall even when the trim looks only mildly damaged.
Press the wall gently with your thumb or a putty knife; healthy drywall feels firm, while damaged areas give way or leave indentations.
Watch the bottom edge where the baseboard covered the seam, since that’s where wicking often starts. If the paper face feels loose, blistered, or breaks apart, mark the damaged section for repair.
You may need to remove a larger strip of drywall than the baseboard alone suggests. Working carefully here helps you protect your space, match the repair correctly, and move forward with confidence alongside others handling the same issue.
Check For Mold Growth
Check the exposed drywall and the underside of the baseboard for mold, especially if the leak sat for more than a day or two.
Use a flashlight and inspect joints, nail holes, and paint lines for black, green, or white spotting. If you smell a musty odor, assume hidden growth may be present behind the trim.
- Wear gloves and an N95 before touching contaminated material.
- Pry the board gently so you don’t spread spores.
- Dry the cavity completely with airflow and dehumidification.
- Replace any porous board with visible growth or staining.
If you see recurring mold, stop the repair and call a qualified remediator.
You’re protecting your wall assembly and your home’s comfort when you catch it early.
How to Reinstall New Trim Cleanly
Set the new baseboard in place with clean, dry walls and a flat, fully prepared surface so the trim seats tightly without gaps.
You’ll get the best fit by dry-fitting each piece first, checking corners, seams, and door casings before fastening. Use a miter saw for crisp cuts and leave a slight expansion gap at floor irregularities.
Apply a thin bead of construction adhesive, then nail the trim into studs or solid blocking with finish nails. Set each nail just below the surface, fill holes with matching wood filler, and sand lightly once it cures.
Caulk only the top edge where the wall meets the trim for a neat line. Wipe away excess immediately, and you’ll help the room look restored and professionally finished.
Prevent Future Baseboard Water Damage
To prevent future baseboard water damage, keep moisture from reaching the trim in the first place by fixing leaks, improving ventilation, and controlling humidity in the room.
You’ll protect the wall assembly and stay ahead of hidden decay when you inspect trouble spots routinely.
- Caulk gaps at tubs, sinks, and exterior penetrations.
- Install exhaust fans and run them during showers.
- Use a dehumidifier when indoor humidity stays high.
- Seal baseboard ends and paint all exposed edges.
Check flooring connections after spills and clean them fast.
If you see staining, soft paint, or swelling, trace the source before it spreads behind the trim.
When your home’s moisture control is consistent, your repair work lasts longer, and you’re part of the crew that keeps small problems from becoming major replacements.
Frequently Asked Questions
Can I Repair Baseboards Without Removing All the Trim?
Yes, you can often repair damaged sections without removing all trim if you can dry, clean, and stabilize the baseboard, but you’ll need to replace any swollen, soft, or moldy lengths and inspect hidden moisture carefully.
How Long Should Baseboards Dry Before Repairs Begin?
Usually, you should let baseboards dry for 48–72 hours before repairs; trapped moisture can linger longer. You’ll want a moisture meter reading below 15%, so you’re joining a long line of successful repairs.
What Tools Are Needed for Minor Baseboard Repair?
You’ll need a utility knife, putty knife, sanding block, pry bar, wood filler, caulk, primer, paint, and a nail set. Use a tape measure and level so your repairs fit cleanly and look professional.
Can Painted Baseboards Hide Hidden Water Damage?
Yes—painted baseboards can hide hidden water damage; about 60% of moisture issues start behind trim. You should probe soft spots, check seams, and use a moisture meter, so you’ll protect your home and fit in confidently.
Should I Test for Mold Behind Damaged Baseboards?
Yes, you should test for mold behind damaged baseboards if you smell musty odors, see staining, or have had leaks. You’ll protect your home’s structure, and you’ll join others who’ve learned early detection saves costly repairs.
Conclusion
You can usually save a baseboard if the damage stays cosmetic, but you should replace it once swelling, softness, or warping reaches the substrate. One useful stat: the EPA reports indoor humidity above 60% can support mold growth, which is why drying matters as much as the repair itself. When you fix the leak, dry the cavity, and reinstall moisture-resistant trim, you’ll protect the wall, limit future rot, and keep the finish looking clean.