
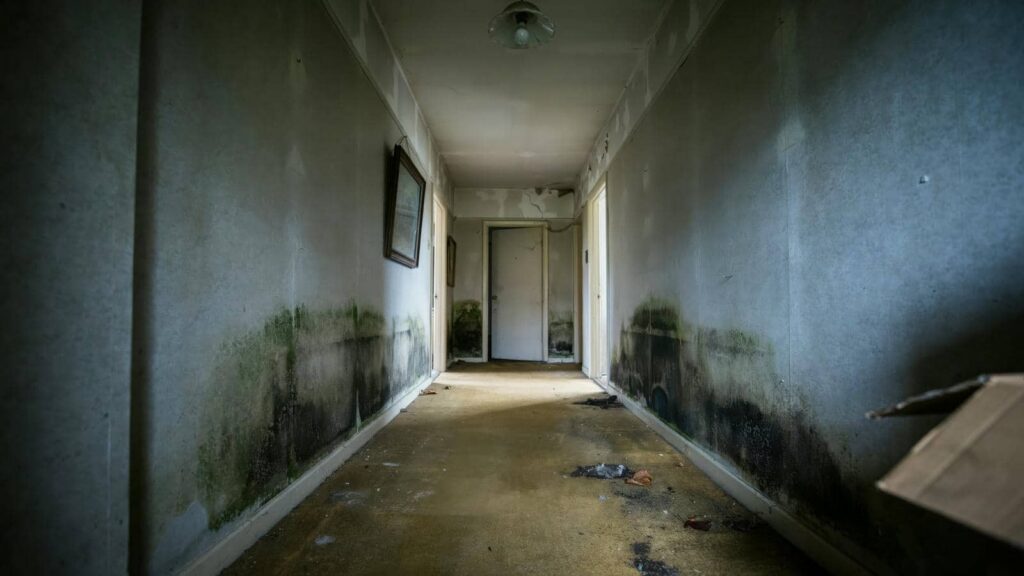
Before you repair water damaged walls, you need to stop the leak and dry the area fully, or the damage will return. You’ll then cut out compromised drywall, inspect the cavity for mold or hidden rot, and replace what can’t be saved with properly fitted materials. The real issue is knowing what to remove, what to treat, and when the damage goes deeper than it looks.
Key Takeaways
- Find and stop the water source first, whether it’s a leak, roof entry, window gap, or plumbing failure.
- Dry the wall completely with fans, dehumidifiers, and cross-ventilation before any repairs begin.
- Remove damaged drywall and wet insulation, then inspect the cavity for mold, soft spots, and hidden structural damage.
- Repair only after the area is clean and dry, using matching drywall, proper fastening, and mold-resistant materials.
- Prevent future damage by sealing gaps, maintaining gutters and plumbing, and monitoring repaired areas for new moisture.
Identify the Leak and Stop It
Before you repair water-damaged walls, you need to find the source of the leak and stop it completely. Inspect nearby plumbing, roof penetrations, windows, baseboards, and exterior cracks for active moisture.
Use a flashlight, moisture meter, and your hands to trace stains, soft spots, and dripping lines. If the leak comes from a pipe, shut off the supply valve and repair or replace the faulty section.
For roof or exterior entry points, seal gaps, flashing, and failed caulk right away. Mark the affected area so you can track progress with the team.
In how to repair water damaged walls, stopping the intrusion first protects your work and keeps the damage from spreading. If you can’t isolate the source, call a licensed plumber or contractor.
Dry the Wall Completely
Open windows and run fans to increase airflow across the wet wall as soon as you’ve stopped the leak.
Set up dehumidifiers to pull moisture from the air and accelerate drying behind the surface.
Keep the equipment running until the wall, insulation, and framing read dry on a moisture meter.
Increase Airflow Quickly
Once you’ve removed any wet materials, increase airflow fast so the wall can dry completely. Open nearby windows if weather allows, and create cross-ventilation by opening doors on both sides of the affected area.
Place box fans or high-velocity fans several feet from the wall and aim them across the surface, not directly into loose drywall edges. Keep furniture, rugs, and storage items away so air reaches every damp section.
If you belong to a busy household, assign one person to monitor airflow and another to check the wall every few hours. Leave baseboard gaps, access panels, and closet doors open when safe.
Continue this setup until the wall feels dry to the touch and no cool, damp spots remain.
Use Dehumidifiers
Even with strong airflow, a dehumidifier helps pull remaining moisture out of the wall cavity and surrounding room air. You should place one or more units in the affected room, close windows and doors, and keep the drain bucket or hose working continuously.
Aim for steady operation until the wall reads dry on a moisture meter and the indoor humidity stays below 60%. Move the unit so air can reach damp baseboards, corners, and hidden cavities.
If you removed drywall, keep the dehumidifier running while framing and insulation dry. Check filters daily and empty tanks promptly.
This step protects your home, supports your repair crew, and helps your space feel safe again. Don’t rush rebuilding; trapped moisture can invite mold and weaken materials.
Remove Damaged Drywall and Insulation
You should cut out all visibly damaged drywall to expose the wall cavity and remove any material that can’t dry fully.
If the insulation is wet, moldy, or compressed, replace it instead of trying to salvage it.
Make clean, straight cuts past the damaged area so you can inspect the framing and prepare for proper repair.
Cut Out Damaged Drywall
Cut away all drywall that shows swelling, crumbling, staining, or soft spots, since water-damaged gypsum board won’t dry back to full strength. Mark the cut lines on studs and make straight, square cuts with a utility knife or drywall saw.
Remove the panel cleanly so you can inspect framing, fasteners, and hidden edges for moisture. If the board feels soft near seams, extend the opening until you reach solid material.
Bag debris right away to keep dust controlled and your workspace organized. When you expose the cavity, check for trapped water, discoloration, and musty odor, then let the area ventilate.
You’re building a sound repair zone now, and precise removal gives your wall crew a clean, reliable base for the next step.
Replace Wet Insulation
If insulation inside the wall is wet, remove it along with any remaining damaged drywall so the cavity can dry completely.
Wear gloves, a respirator, and eye protection, then pull out soaked batts, loose-fill, or compressed foam without tearing the framing.
Bag and discard contaminated material immediately; don’t try to dry insulation that’s already saturated or moldy.
Inspect studs, plates, and wiring for staining or soft spots, and clean the cavity with a HEPA vacuum and a mild antimicrobial solution.
Keep fans and a dehumidifier running until the framing reads dry on a moisture meter.
When you’re rebuilding, install new insulation sized for the cavity and approved for your wall type.
Doing this carefully helps your repair crew keep the wall assembly sound, safe, and ready for finish work.
Look for Mold and Hidden Damage
Once the wall is open, inspect the cavity for mold growth, softened drywall, rusted fasteners, swollen framing, and damp insulation, since hidden damage often extends beyond the visible stain.
Use a flashlight and probe suspicious areas with a screwdriver to confirm firmness. If you find dark spotting, musty odor, or fuzzy colonies, treat the space as contaminated and keep dust controlled.
Check corners, bottom plates, and around penetrations where moisture can linger. Measure moisture with a meter so you’re not guessing.
You’re part of a crew that values clean, safe repairs, so document what you see before you close anything up.
If materials stay wet or structural members feel compromised, stop and get a qualified pro involved.
Replace the Damaged Wall Sections
After you’ve confirmed the cavity is dry, clean, and free of hidden damage, remove and replace the compromised wall sections with new material. Cut back to sound drywall or plaster, extending past any soft, swollen, or stained areas.
Use a straightedge and utility knife for clean edges, then match thickness, texture, and fastening method so the repair sits flush. If you’re working with drywall, screw the patch to backing cleats or studs for solid support.
Keep joints tight, and tape seams only after the patch is secure. For masonry or paneling, fit replacements to the existing assembly without forcing gaps.
You’re restoring structural continuity here, so take your time and check alignment. A careful fit helps your wall feel whole again and gives your crew a professional result.
Prime, Seal, and Repaint the Wall
Prime the repaired area with a stain-blocking primer to lock down any lingering discoloration and create a uniform surface for finish coats.
Brush primer into seams, fastener heads, and patched joints, then roll the field in thin, even passes. Let it cure fully, because trapped moisture can telegraph through later coats.
If the wall still feels porous, apply a compatible sealer to improve adhesion and reduce absorption.
Once dry, sand lightly with fine-grit paper to remove lap marks and restore a smooth profile. Vacuum dust, then apply two finish coats of quality interior paint, keeping a wet edge to avoid flashing.
Use the same sheen across the wall so the repair blends in cleanly. When you take each step carefully, your wall looks consistent again, and your room feels whole.
When to Call a Water Damage Pro
Even a well-prepared repair can hit a point where the damage is too widespread or hidden for a standard DIY fix.
Call a water damage pro when moisture reads high after drying, when drywall feels soft beyond a small area, or when baseboards, insulation, or framing stay damp.
If you smell mildew, see discoloration spreading, or spot warped studs, you need specialist tools and containment.
You should also bring in help after clean water sits more than 24 to 48 hours, or any time sewage, contaminated runoff, or a roof leak affects multiple rooms.
A licensed pro can measure moisture, open walls safely, dry cavities, and test for mold.
Getting expert help early protects your home, keeps your crew safe, and helps you get back to normal faster.
Frequently Asked Questions
How Long Does Drywall Usually Take to Dry Completely?
Drywall usually takes 24 to 72 hours to dry completely, but you’ll need longer if moisture soaked the insulation or framing. Use fans, dehumidifiers, and open airflow to help you dry it faster.
Can Water-Damaged Studs Be Repaired Without Full Replacement?
Yes, you can repair mildly damaged studs if you fully dry them, remove rot, and treat mold. You’ll need structural evaluation; severely softened, split, or warped studs usually require replacement for safety.
What Tools Detect Moisture Behind Finished Walls?
You’ll use a pin moisture meter, noninvasive capacitance scanner, thermal camera, and hygrometer to detect hidden dampness behind finished walls. You can compare readings, confirm suspect areas, and guide targeted opening, drying, and repair.
How Do You Match New Paint to an Older Wall?
You match new paint by sampling the old finish, checking sheen, brand, and base, then using a tinted primer and test patches. You’ll blend edges carefully; custom color-matching helps you restore a seamless, familiar wall.
Does Homeowners Insurance Cover Water Damage Repairs?
Usually, yes—if you’ve got covered water damage from a sudden, accidental event. You’ll need to document it, dry materials fast, and file promptly. Wear the right hat and review exclusions for leaks, floods, and negligence.
Final Thoughts
When you repair water-damaged walls the right way, you don’t just patch a surface—you protect the structure behind it. Stop the leak fast, dry the cavity completely, remove compromised drywall and insulation, and check carefully for mold or hidden damage. Then replace, seal, prime, and repaint with care. If the damage is extensive, call a pro. One missed step can trigger a thousand headaches, so stay precise and prevent the problem from returning.